
Building a checklist and giving it to your agents
Published
Write the items, group them into categories, demand a photo or a note where it matters, then assign the checklist to the agents who will complete it in the app.
How do I build a checklist and get it to my agents?
Click New Form, choose Checklist, and add items on the Checklist Items tab. Each item can be Required, and can demand a photo or a note. Group them with Manage Categories, and drag or use the arrows to reorder. Then publish it, open its actions menu in Forms, choose Manage assignees and tick the agents who should complete it — an unassigned checklist never appears in the app.
A checklist is a form built around things to tick off rather than questions to answer: an opening routine, a safety inspection, a vehicle check. Your agents complete it in the Survtapp app, on site, with or without a signal.
Create it
- From the dashboard, click New Form and choose Checklist.
- You land in the builder on the Checklist Items tab.
- Click Add Item and write what has to be checked.
What each item can ask for
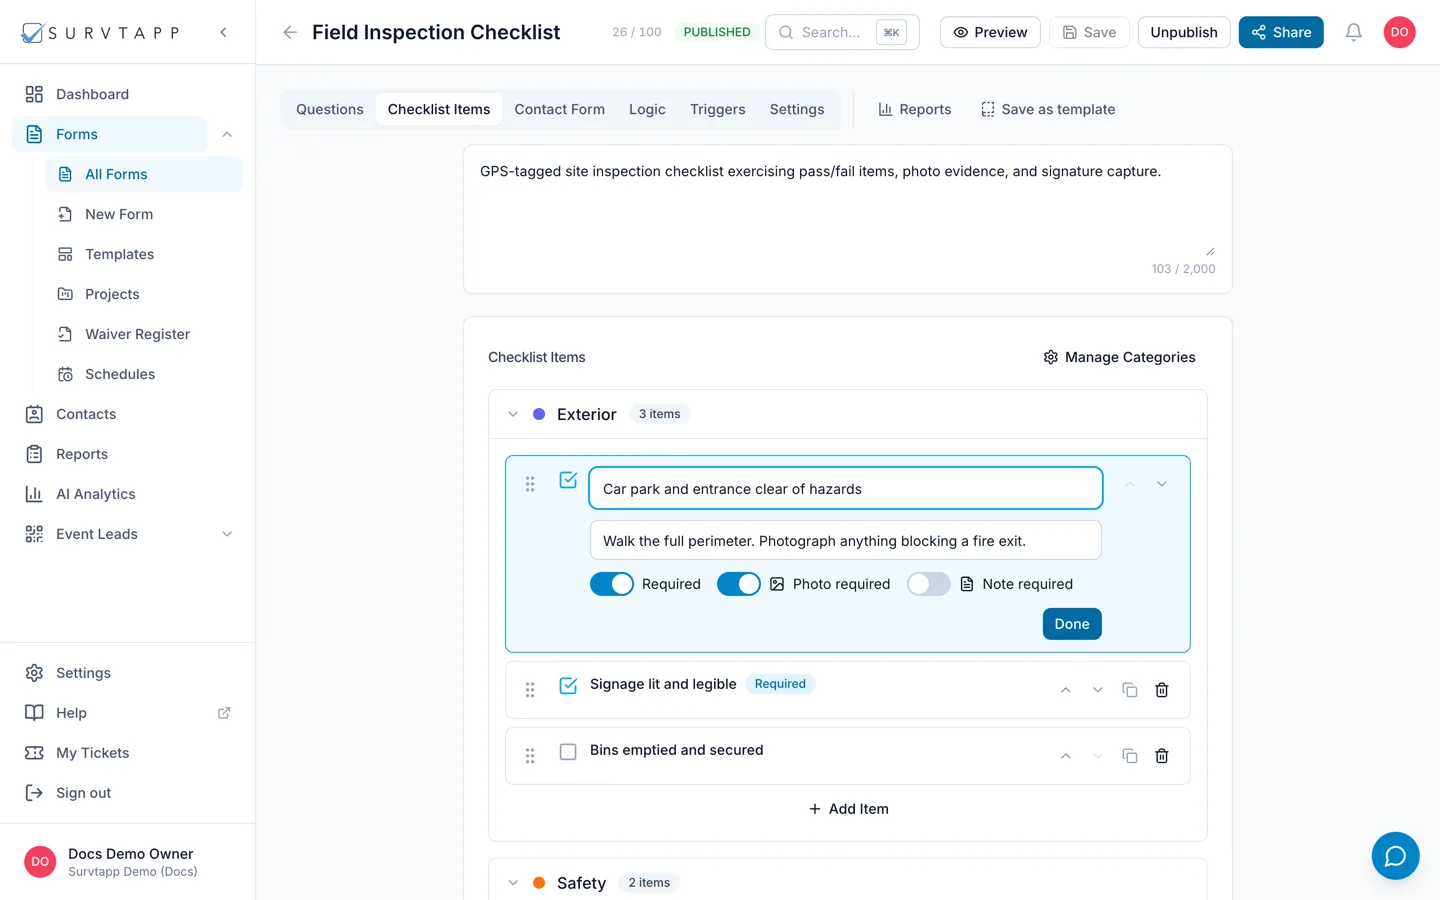
Click an item to open it. It has the item text, an optional second line — "Optional description or instructions" — and three switches:
- Required — the checklist cannot be submitted until this item is ticked.
- Photo required — ticking it is not enough; the agent has to attach a photo. This is the one that turns "yes I checked it" into evidence, and it is worth using on anything you would want to see later.
- Note required — the agent has to type something. Good for a reading, a serial number or a reason.
Photo and note requirements are honoured in the Survtapp app, where the item shows a note box and a photo button right under it. Both count toward your account’s storage, the same as any other photo.
Grouping items into categories
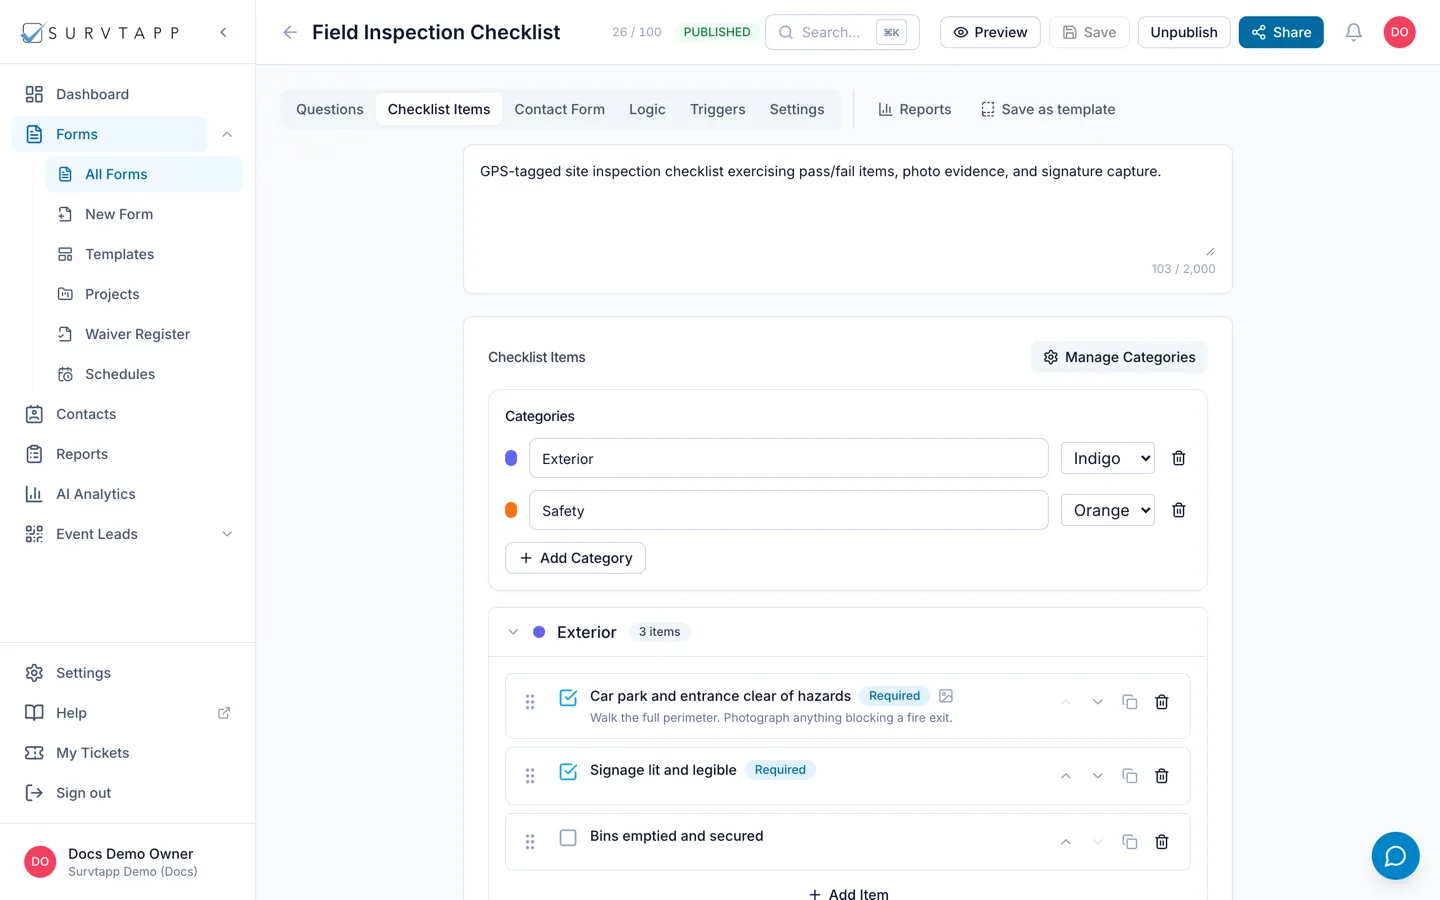
A long checklist reads better in sections. Use Manage Categories to name them and give each one a colour, then add items under the category they belong to. Categories collapse in the builder, so you can work on one section at a time.
Reordering, duplicating and deleting
Drag an item by its handle to move it, or use the up and down buttons — both work, and the buttons are there for anyone who cannot drag. Duplicate copies an item with its switches, which saves retyping a run of near-identical checks. Delete removes it.
The rest of the builder
A checklist has the same tabs as a survey beyond its items: Questions for anything that needs a real answer (a meter reading, a photo, a signature), Contact Form, Logic, Triggers and Settings. Items and questions sit on the same submission, and both appear in the response.
Give it to your agents
This is the step that gets missed, and the symptom is always the same: "my agent says the checklist is not there."
- Publish the checklist — a draft never reaches the app.
- Go to Forms, find it, and open its actions menu.
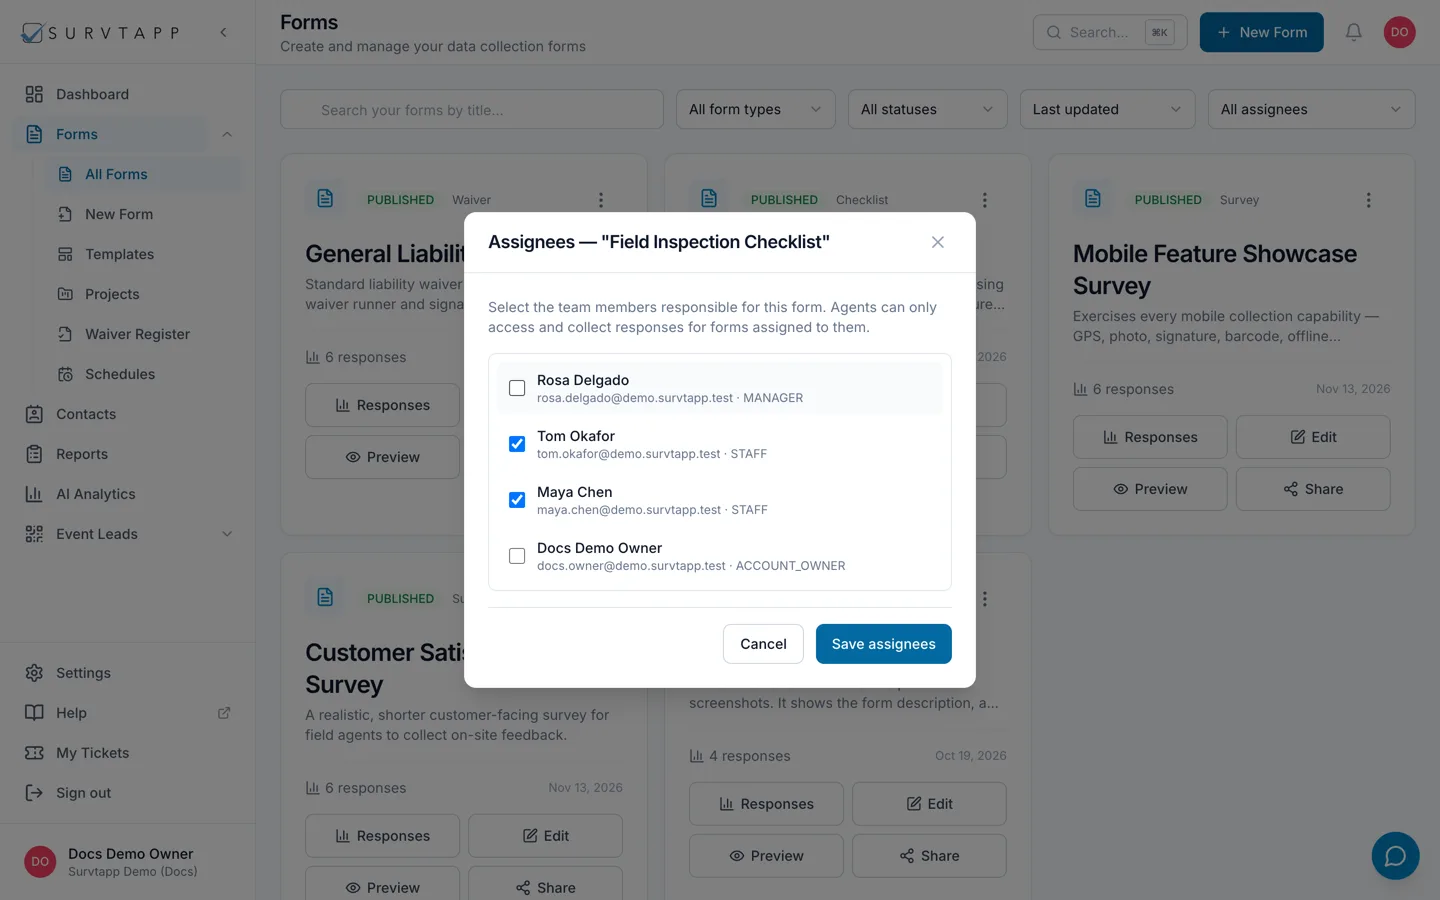
- Choose Manage assignees, tick the people who should complete it, and click Save assignees.
- Ask the agent to pull down to refresh in the app.
Assignees are individual people, not a team or a role: everyone you tick gets it, and nobody else sees it. An agent who has not accepted their invitation cannot sign in anywhere, so check that first if a name is missing from the list.
What the agent sees
The checklist appears in their forms list with a Start button. Each item is a line to tick, with its description underneath and — where you asked for them — a note box and a photo button. The progress bar counts the items as well as any questions, so a half-done checklist reads as half done. They submit it like any other form, and it syncs when there is a connection.
Making it come round again
If the same checks happen every morning, every Monday or every quarter, put the checklist on a schedule rather than handing it out by hand — see Recurring checklists: running the same checks on a schedule.
Frequently asked questions
My agent cannot see the checklist in the app.
Three things, in this order: is the checklist published, is that agent ticked under Manage assignees, and have they pulled down to refresh? Nearly always it is the second one.
Can I make a photo compulsory on one item but not the rest?
Yes. Photo required is per item, so you can demand evidence on the two checks that matter and leave the rest as a tick.
What is the difference between a checklist item and a question?
An item is a thing to tick, optionally with a photo or a note. A question captures an answer — a number, a date, a signature, a choice. A checklist can hold both: the items on the Checklist Items tab, the questions on the Questions tab.
Can agents complete a checklist with no signal?
Yes. It is saved on the device as soon as they submit it and uploaded when a connection returns, with the time it was actually completed. See Collecting on the mobile app, online or offline.