
Send a form or waiver link to someone
Copy the link, email it, print a QR code, or embed it in your website — every way to send a form or waiver link to someone.
Every form you publish gets its own web address. Send that address to someone and they can open the form in any browser, on any device, without a Survtapp login. This article covers every way to hand it over: copy and paste, email, a QR code, or an embed in your own website.
Before you start: the form has to be published
A share link only opens a published form. On a draft, the form builder shows a Publish button instead of a Share button, and publishing is also what creates your first share link. See “Publishing a form and what each status means” if you are not there yet.
Sharing is available to Managers and above.
Waivers are private until you turn the link on
This is the one step people miss. A waiver is private by default, because most waivers are signed in person by your own agents in the Survtapp app rather than sent out on the open web. A published waiver with a perfectly good share link will still refuse to open for an outside visitor until you switch its public link on.
- Open the waiver from Forms, then go to the Settings tab.
- Find the Visibility card and turn on Enable public web link.
- Press Save in the header. The setting is not applied until you save.
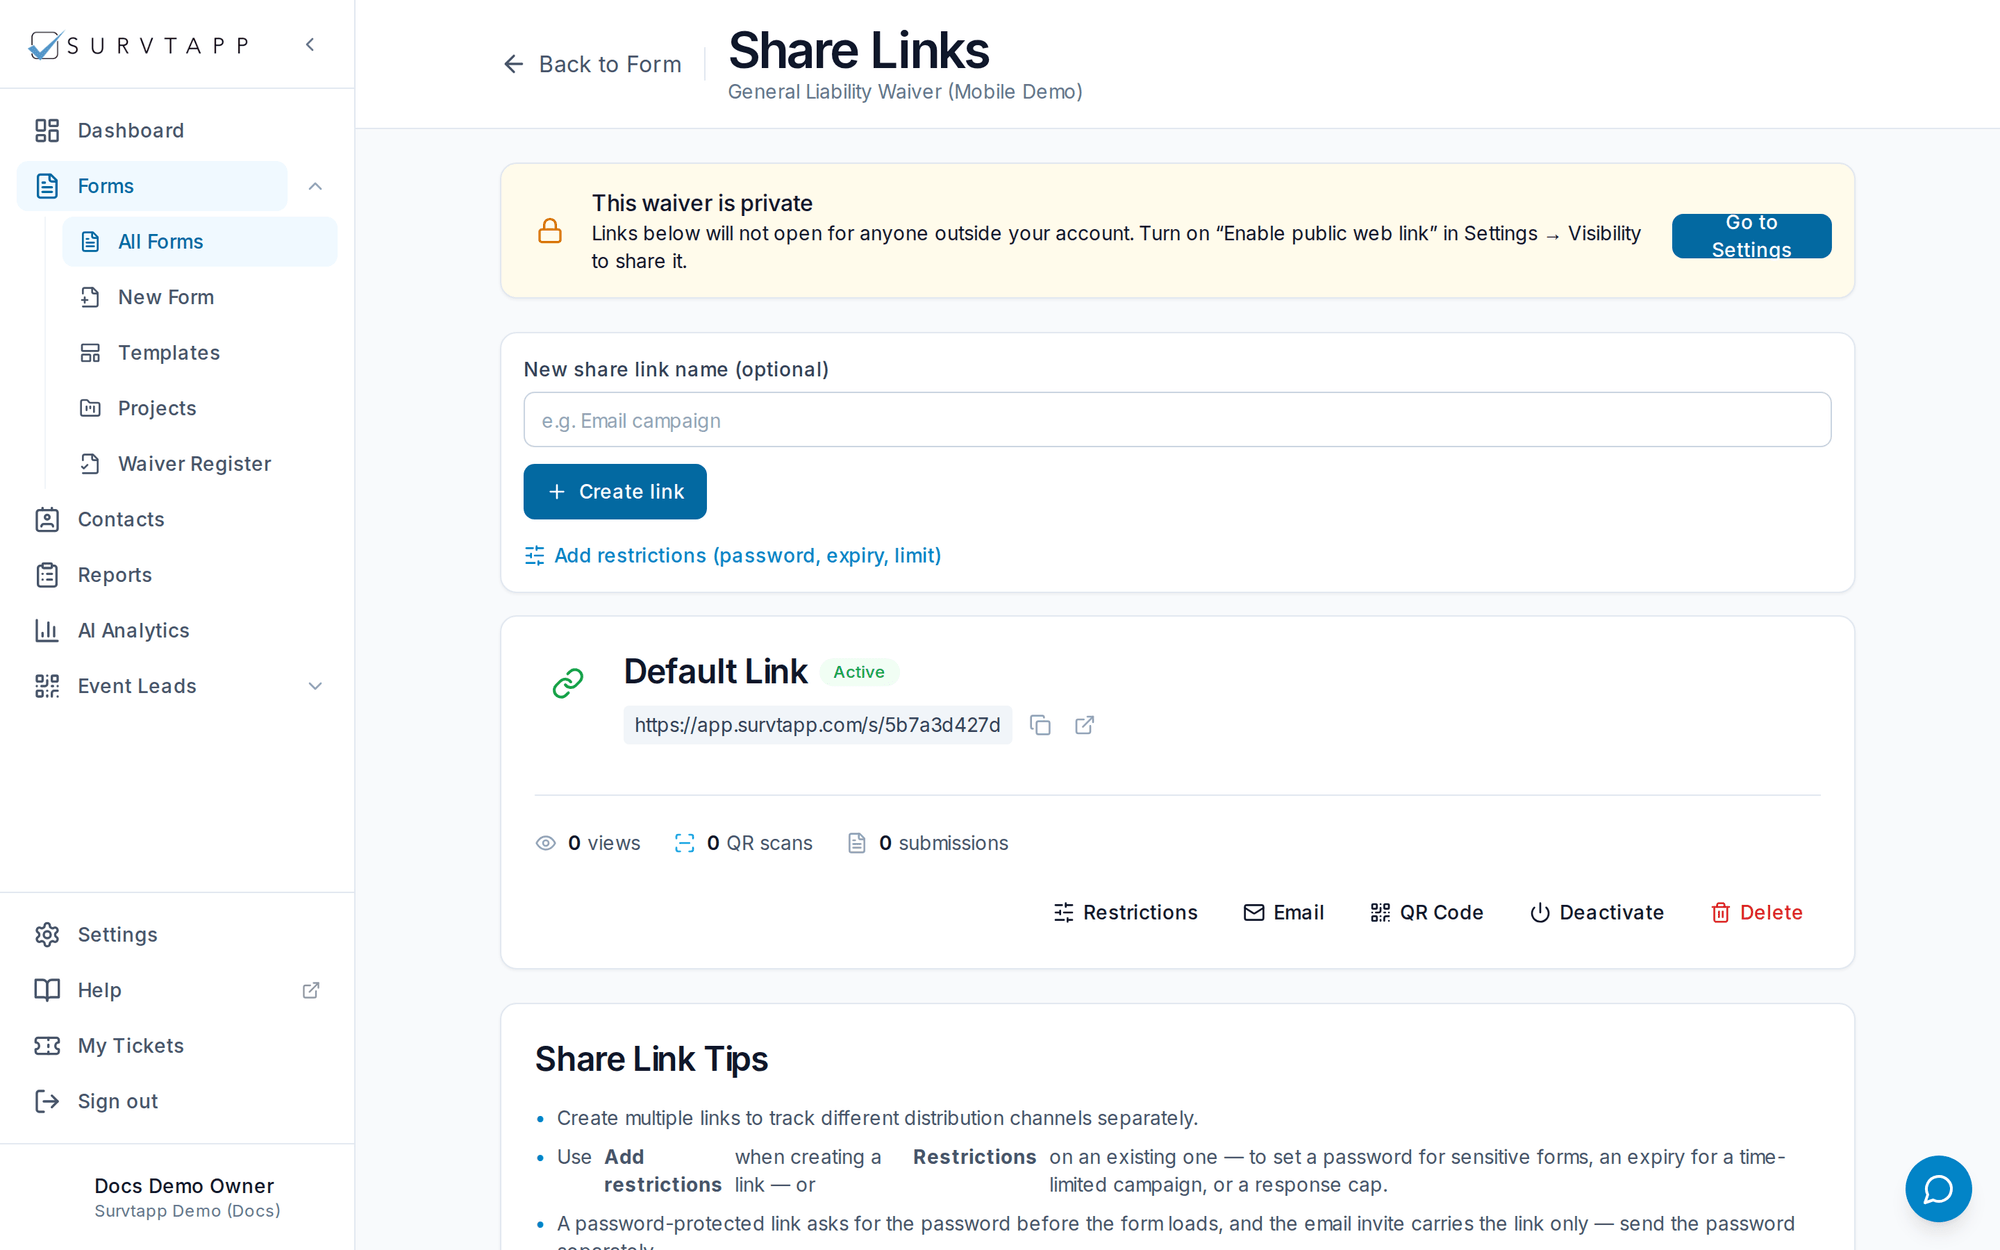
If you skip this, the Share Links page shows a warning reading "This waiver is private", and anyone you send the link to sees "This link is no longer available". Surveys and checklists are public as soon as they are published, so this step applies to waivers only.
Find the Share Links page
- Go to Forms, then All Forms, and open the form.
- Click Share in the builder header. This button appears once the form is published.
- You land on the Share Links page, which lists every link for this form.
Publishing creates one link called Default. To create another, type a name in New share link name and click Create link. Separate links are useful when you want to know which channel a response came from, because views, QR scans and submissions are counted per link.
A share link is your Survtapp web address followed by /s/ and an eight-character code. The code belongs to the link rather than to the form, so two links for the same form have two different addresses — which is what makes the per-link counts meaningful.
The four ways to send it
Each link on the page has its own set of actions.
- Copy link — the copy icon puts the address on your clipboard. Paste it into a message, a document, a social post, an email you write yourself, or a printed flyer.
- Email — opens Send by email. Type one or more addresses, separated by commas or spaces, add an optional personal message, and click Send. Survtapp sends each recipient an email from your account with the form title, your message and an Open Form button. You can send to up to 50 addresses at a time.
- QR Code — shows the code on screen with a Download PNG button. Print it on a table card, a poster or a badge. Scanning it opens the form and counts a QR scan against that link.
- Open link — opens the live form in a new tab, so you can check what a recipient will see.
The Email action sends real email from Survtapp to the addresses you type. It does not pick recipients from your Contacts — there is no contact-list picker in this flow, so paste the addresses you want.
Embedding the form in your own website
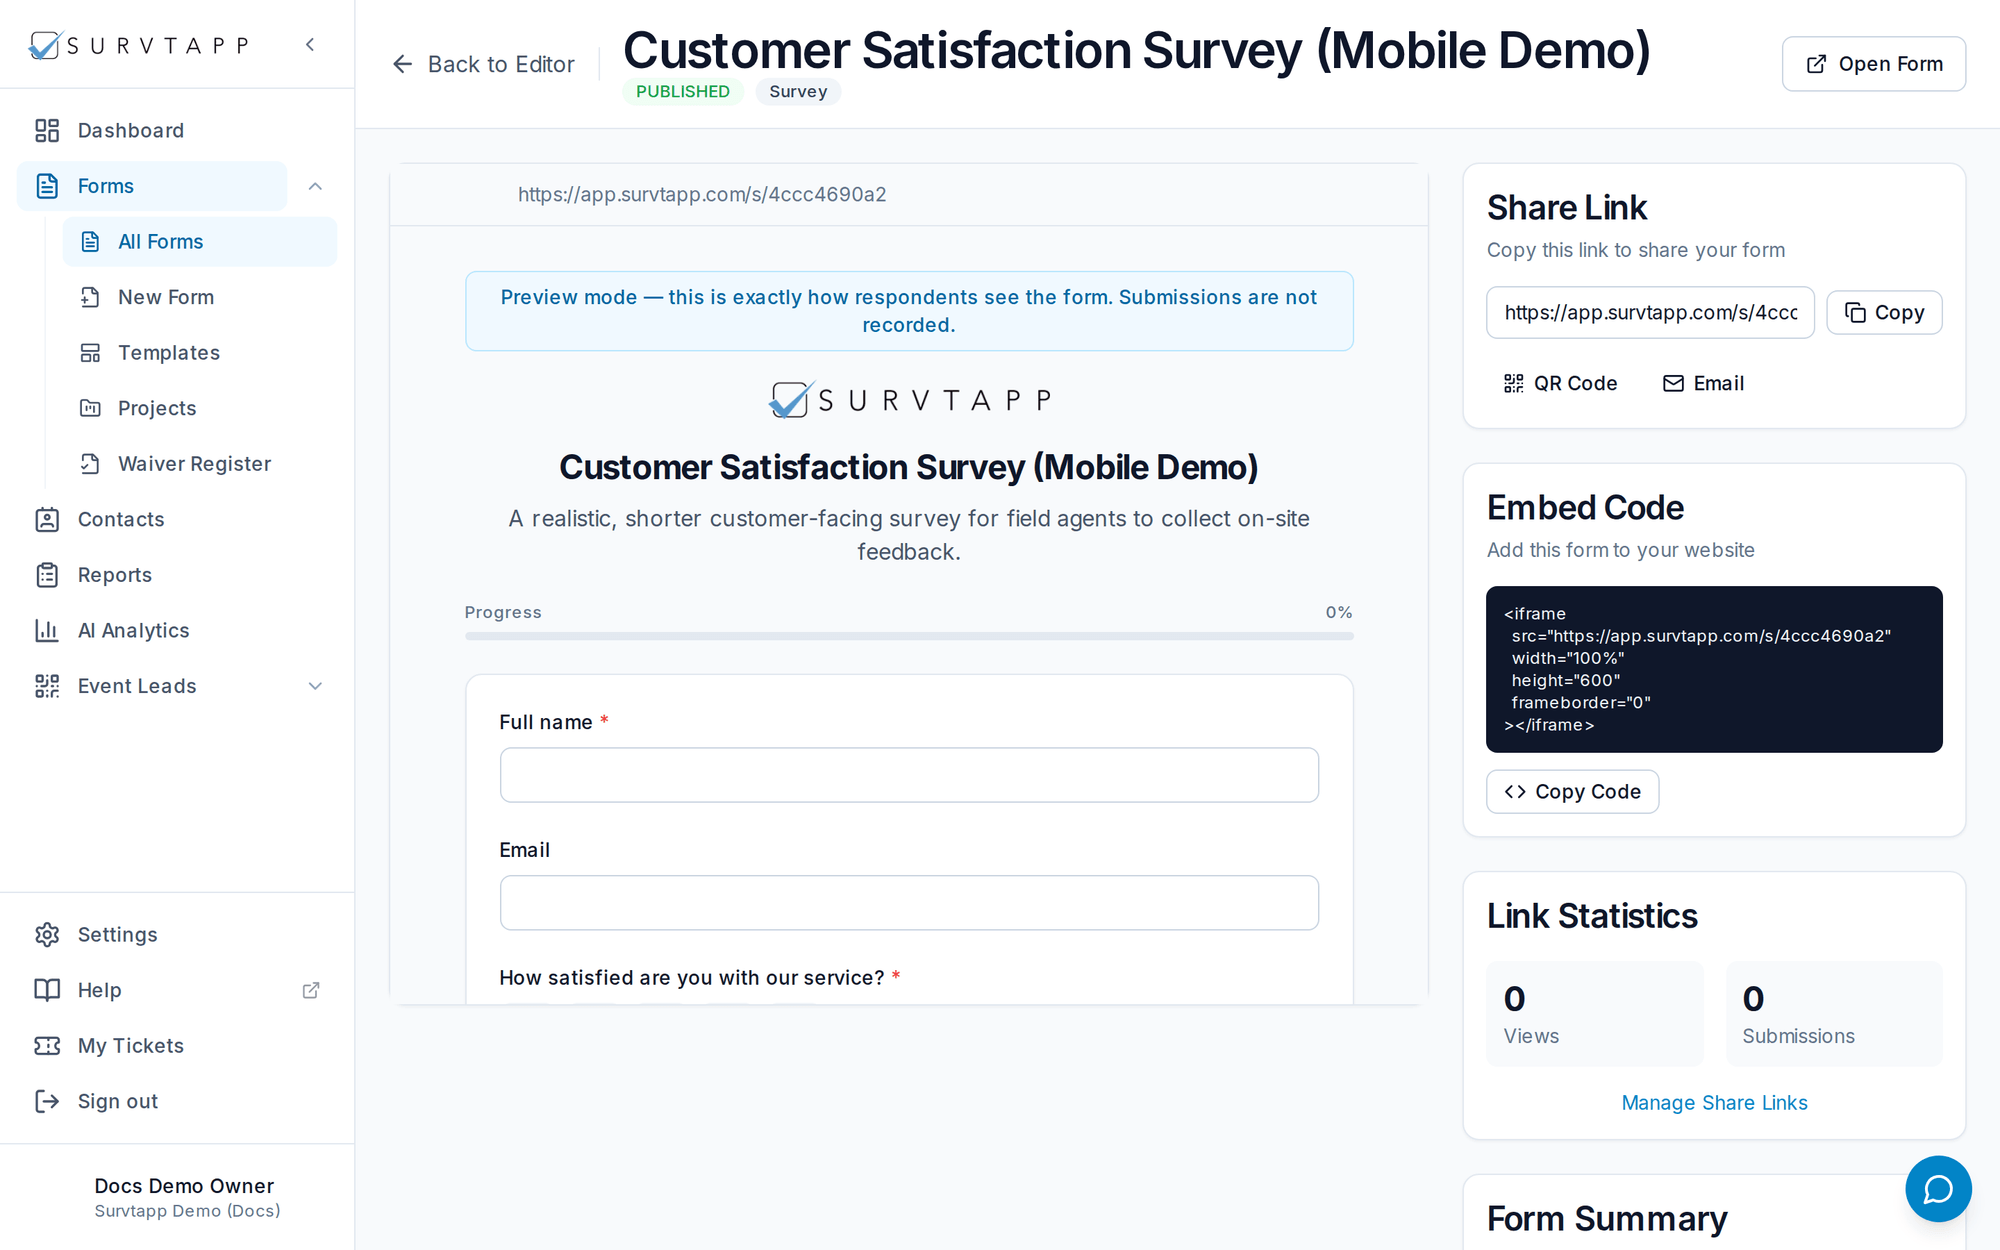
Open the form and click Preview. The right-hand column has an Embed Code card containing an iframe snippet pointing at the share link. Select the snippet, copy it, and paste it into your own page where you want the form to appear. Adjust the height value to suit your form.
Turning a link off again
Use Deactivate to stop a link working without deleting it, and Activate to switch it back on. Delete removes the link permanently along with its QR code and scan statistics. Responses already collected through that link are never affected.
One thing to watch: publishing a form creates a new Default link each time. If you unpublish and republish, you will have more than one Default link and the older code still works. Check which link you are handing out, and deactivate the ones you no longer want in circulation.
If a recipient says the link does not work
The page they see names the reason. Match what they tell you to this list.
- "This form is not currently accepting responses" — the form is not published, or has been taken offline. Publish it; see “Publishing a form and what each status means”.
- "This link is no longer available" — either the link was deactivated, or it is a waiver whose public web link has not been switched on. Check both.
- "This link has expired" or "This form is no longer accepting responses" — the link carries an end date or a response cap that has been reached.
- "This form is not open yet" or "This form has closed" — the form itself has a start or end date set in its settings.
- "Form not found" — the address is wrong or incomplete. Long links are often broken across lines by email apps; send it again.
A note on QR codes and scan counts
Take your QR code from the Share Links page when you care about scan statistics. The QR shown on the Preview page encodes the plain form address, so scans of that one are not counted.
You may also see this page mention password protection, expiry dates and per-link response caps. Those controls are not available to set here yet. To stop a link being used, deactivate it.